What makes the colors make the color orange? Green? Black? With this easy experiment, kids discover how colors are made by using markers, water, and a coffee filter – things you probably already have at home!
Preview this experiment with our demonstration video and learn new vocabulary with the scientific explanation of how the experiment works. A supplies list and detailed instructions can be found below.
JUMP TO SECTION: Instructions | Video Tutorial | How it Works | Purchase Lab Kit
Supplies Needed
- Different Colored Markers (We used Blue, Green, Orange and Black)
- Coffee Filter (You can also use Blotting Paper)
- Small Drinking Glass
- 1 teaspoon Salt
- Water
How Colors are Made Science Lab Kit – Only $5
Use our easy How Colors are Made Science Lab Kit to grab your students’ attention without the stress of planning!
It’s everything you need to make science easy for teachers and fun for students — using inexpensive materials you probably already have in your storage closet!
How Colors are Made Experiment Instructions
Experiment Setup – Before you begin the experiment talk about the various marker colors that you’ll be experimenting with. Talk about the colors, explain that some colors are called primary colors (red, yellow & blue) and these colors can be mixed together to make new colors. Make some observations about the colors you’ve selected for the experiment. Are you using any primary colors?
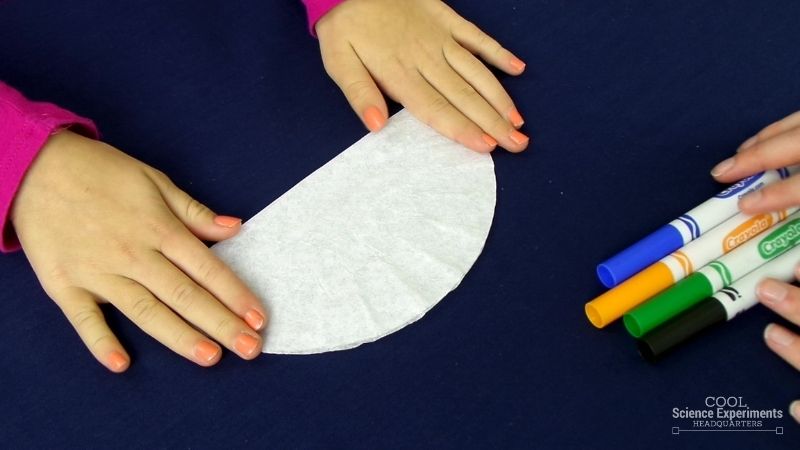
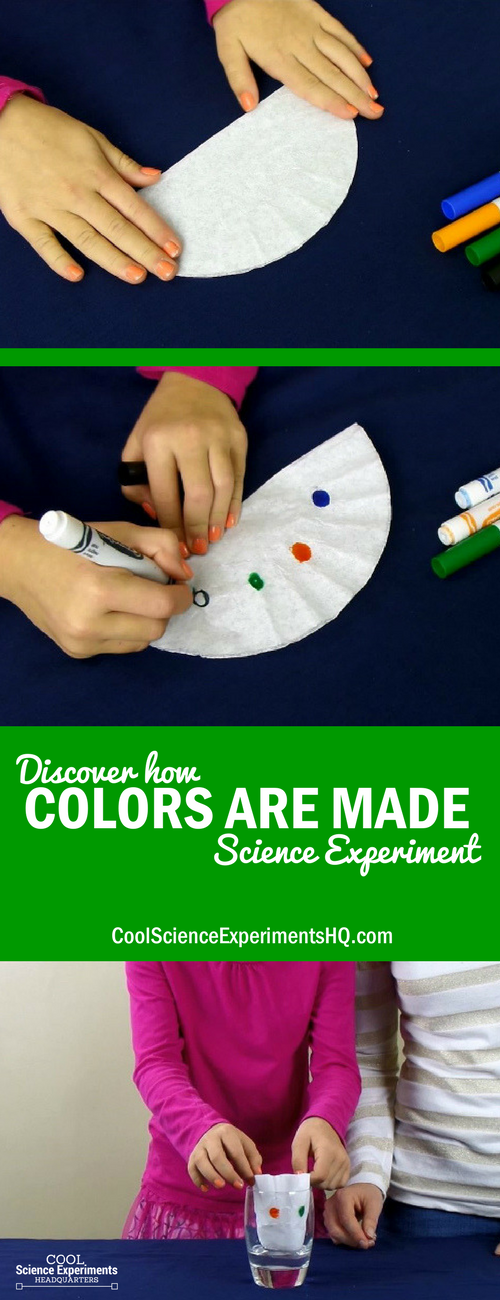
Step 1 – Begin the experiment by preparing your coffee filter. Smooth the coffee filter out and fold it in half.

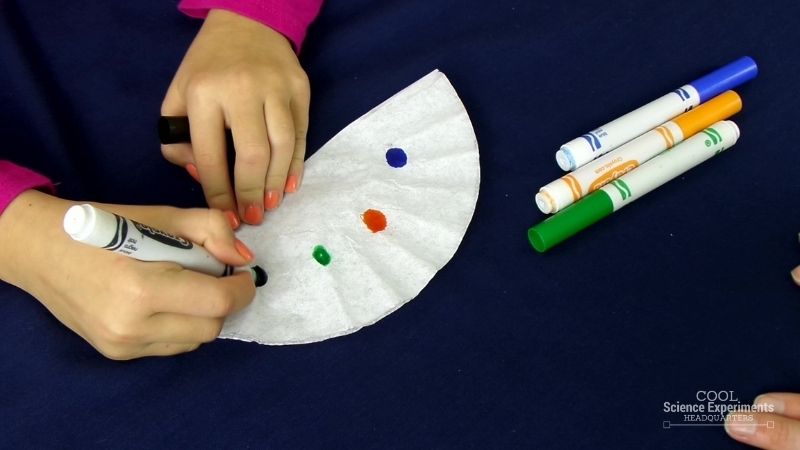
Step 2 – Next, use the markers to draw and color in circles of different colors on the coffee filters. The circles should be an inch apart and near the center of the coffee filter.
Helpful Tip: Only use 4 colors max per coffee filter. If you want to experiment with more than 4 colors then use multiple coffee filters.

Step 3 – Pour one inch of water into an empty glass and add one teaspoon of salt. Stir until the salt is combined.
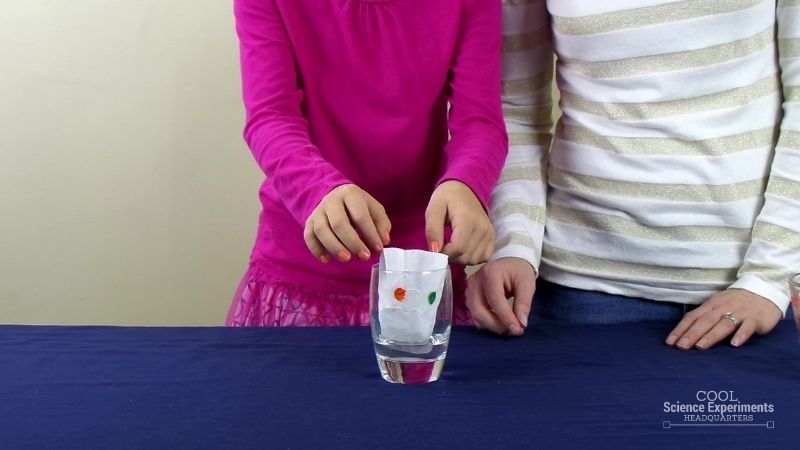
Step 4 – Shape the coffee filter into a cylinder and place it into the glass. The bottom of the coffee filter should just touch the water. Then take a few minutes to make some observations. Do you notice anything happening with the water and the coffee filter? Let the glass and coffee filter sit for 30 minutes to an hour and then come back to see what happened.

Step 6 – When you return to the glass, what has changed? Carefully remove the coffee filter from the glass and set it flat on the table. Observe what has happened to the colored circles. You’ll notice how the colors have spread across the coffee filter and that some of them have changed from the original marker color
Do you know what caused the colors to spread? And why some of the colors stayed the same, while others changed? Find out the answer in the how does this experiment work section below.
Video Tutorial
Discover How Colors are Made Science Experiment Step by Step Instructions
How Does the Science Experiment Work
Over the course of the hour, the coffee filter gradually absorbs water. The coffee filter is able to absorb water through the process of capillary action. Water is able to move against the force of gravity and climb the coffee filter because water molecules stick to each other AND they stick to the fibers of the coffee filter. As water molecules are attracted to the fibers of the coffee filter, they pull other water molecules with them. Once the water gets to the colored circles, the color starts to spread up the coffee filter.
The colors spread because of a process called chromatography. Chromatography is the separation of a mixture by passing a solution through a medium. Simply put, in this experiment, you are separating the colored ink of the markers (the mixture) with water (the solution) using a coffee filter (the medium).
Now let’s talk about the colors! When a primary color (red, yellow, blue) spreads it will stay the same color. When a secondary color (green, orange, purple) spreads it will change into the primary colors that were originally mixed to make the color. The color black is created by mixing multiple colors together, so when it spreads you see the widest array of different colors.
Primary colors – Red, Yellow & Blue. These color can be mixed together to make other colors
Secondary colors – Orange, Purple & Green. These colors are made by mixing two primary colors together
Tertiary colors – Colors made by mixing a primary color with a secondary color
How Colors are Made Science Lab Kit – Only $5
Use our easy How Colors are Made Science Lab Kit to grab your students’ attention without the stress of planning!
It’s everything you need to make science easy for teachers and fun for students — using inexpensive materials you probably already have in your storage closet!
I hope you enjoyed the experiment. Here are some printable instructions:
How Colors Are Made Science Experiment
Materials
- Different Colored Markers (We used Blue, Green, Orange and Black)
- Coffee Filter (You can also use Blotting Paper)
- Small Drinking Glass
- 1 teaspoon Salt
- Water
Instructions
- Begin the experiment by preparing your coffee filter. Do that by first folding it in half.
- Next, use the markers to draw and color in circles of different colors on the coffee filters. The circles should be an inch apart and near the center of the coffee filter.
- Pour one inch of water into an empty glass.
- Add a teaspoon of salt into the glass and stir until it is combined.
- Shape the coffee filter into a cylinder and place into the glass. The bottom should just touch the water. Let the glass and coffee filter sit for 30 minutes to an hour and then come back to see what happened.
- Wait 30 minutes to an hour and then return to look at the colors. Remove the coffee filter from the glass and set it flat on the table. Observe what has happened to the colored circles. You’ll notice how the colors have spread across the coffee filter and that some of them have changed from the original marker color


Leave a Reply